

Environmental portrait photography captures subjects in their natural surroundings, whether that’s a chef in their kitchen, an artist in their studio, a couple on the windswept cliffs where they got engaged, or a musician surrounded by instruments. The technique layers storytelling into every frame by weaving together person, place, and context to reveal who someone is, not just what they look like.
This approach has surged in 2026 as photographers across every genre seek authenticity over polished backdrops. Location becomes a collaborator in the image. Light, architecture, personal objects, and even weather conditions contribute to the mood. Instead of isolating your subject against seamless paper, you’re composing a layered scene where environment and individual interact.
The method works beautifully for wedding portraits, professional headshots, editorial features, and personal branding. A bride photographed in the garden where she spent childhood summers tells a richer story than the same portrait on white. An entrepreneur framed by the cafe they built from scratch communicates ambition and grit without a single word.
Mastering environmental portraiture requires technical skill in managing variable light, compositional awareness to balance subject and setting, and the ability to direct authentic moments within dynamic spaces. You’ll scout locations, read natural light, adjust camera settings on the fly, and guide your subject to interact naturally with their surroundings. The result? Images that feel cinematic, lived-in, and emotionally resonant because they reflect real life, not a constructed set.
What You Need to Create Environmental Portraits
Environmental portraiture thrives on versatility, so you’ll need gear that adapts to different settings and lighting conditions. The good news? You don’t need a packed studio to create compelling images, most environmental portraits rely on available light and a thoughtful approach rather than elaborate equipment.
Start with a camera body that performs well across varied lighting situations. Full-frame sensors offer excellent low-light capability, which matters when shooting indoors or during golden hour, but crop-sensor cameras work beautifully too. Look for a body with decent dynamic range to retain detail in both your subject and their surroundings, since you’re balancing exposure across the entire frame.
Your lens selection shapes how much environment you include. A 35mm lets you capture expansive context, perfect for showing a chef in their bustling kitchen or an artist surrounded by their studio. A 50mm strikes a comfortable middle ground, offering natural perspective while still including meaningful background elements. An 85mm brings more subject separation when you want the environment present but slightly softer, ideal for headshots with contextual hints. Many photographers start with just one or two of these focal lengths and expand as they discover their preferred shooting distance.
Here’s what belongs in your bag for environmental portrait sessions:
- Camera body with good low-light performance and dynamic range
- Versatile prime lenses, 35mm, 50mm, or 85mm focal lengths
- Collapsible reflector (5-in-1 with white, silver, and diffusion surfaces)
- Off-camera flash or LED panel for backup fill light
- Lightweight light stand and modifier (softbox or umbrella)
The collapsible reflector earns its place as your most-used tool after the camera itself. Position it to bounce window light onto your subject’s face or soften harsh shadows outdoors. The diffusion panel tames strong sunlight when needed.
Optional lighting tools act as insurance rather than primary sources. An off-camera flash with a small softbox gives you control when the available light simply isn’t enough, or when you’re shooting late afternoon and need to balance your subject against a bright background. Keep it simple, one light, used sparingly, maintains the natural feel that defines environmental portraiture. You’re enhancing the existing atmosphere, not recreating it from scratch.
Planning and Safety Considerations

Before you pick up your camera, thoughtful planning protects both your shoot and your subject. Environmental portraits rely on real-world locations, workplaces, parks, studios, city streets, and each comes with its own considerations around access, conditions, and safety.
Start by scouting your location in advance if possible. Visit at the same time of day you plan to shoot so you can assess the light, identify distractions, and spot potential hazards like uneven ground or busy foot traffic. For public spaces like parks or sidewalks, understand local photography regulations; some cities require permits for commercial shoots, even outdoors. Private locations, offices, homes, storefronts, always need explicit permission from the owner or manager. Ask about any restrictions on equipment, hours, or areas you can use.
Weather awareness matters for outdoor shoots. Check forecasts for rain, extreme heat, or high winds that could make your subject uncomfortable or damage gear. Have an indoor alternative ready if conditions deteriorate. Even on clear days, midday sun creates harsh shadows and forces subjects to squint; early morning or late afternoon light is gentler and more flattering. In low-light environments like dimly lit interiors or dusk shoots, know your camera’s limits and bring a reflector or small LED panel as backup rather than relying solely on high ISO.
Communicate openly with your subject about the location’s accessibility and comfort level. If the spot requires walking, climbing stairs, or standing for extended periods, make sure they’re prepared and dressed appropriately. Respect the environment you’re working in, don’t move or damage property, and leave spaces as you found them. If lighting becomes too harsh or weather turns unsafe, stop and reschedule rather than compromising quality or pushing through discomfort. A successful environmental portrait depends on a subject who feels at ease, and that starts with careful, considerate planning.
Step-by-Step: Capturing an Environmental Portrait
Step 1: Choose a Location That Reflects Your Subject
The location you choose becomes a visual chapter in your subject’s story. Start by having an open conversation about where they feel most themselves, their workspace, favorite coffee shop, garden, or a place tied to their passion. The right setting reveals personality and context that a plain backdrop never could.
Consider workplaces for professionals whose careers define them, or home environments that showcase personal style and comfort. Outdoor spaces work beautifully for active subjects or those connected to nature. Hobby environments, a studio, garage, kitchen, sports field, instantly communicate what matters to someone.
Look for location ideas that offer visual richness: interesting textures, colors that complement your subject, and elements they can interact with naturally. A painter in their studio surrounded by canvases tells a different story than the same person in a neutral setting.
The connection between person and place should feel authentic, not forced. If your subject lights up talking about a location, that enthusiasm will translate through the lens.
Step 2: Scout the Environment and Identify Key Elements
Walk through your chosen location with intention before you bring in your subject or set up any gear. This pre-shoot scout is where you discover the visual story hiding in the space. Start by identifying background elements that add meaning, bookshelves in a writer’s home office, tools in a woodworker’s studio, street signs in a musician’s neighborhood. Look for textures like brick walls, weathered wood, or fabric that create depth and visual interest without overwhelming the frame.
Pay attention to colors in the environment. Do they complement or contrast with what your subject will wear? A warm rust-colored wall might enhance earth tones, while cool industrial grays can make vibrant clothing pop. Notice props or objects your subject naturally interacts with, a chef’s cutting board, an artist’s brushes, a gardener’s gloves, and consider how these elements can anchor the composition.
Finally, observe light sources and their direction. Where do windows cast soft light? When does harsh overhead lighting create unflattering shadows? Track how the light changes if you’re shooting over an extended period. This awareness lets you position your subject in the most flattering zones and plan whether you’ll need reflectors to fill shadows or flags to control brightness.
Step 3: Work with Available Light
Light tells the story before you even press the shutter. Start by observing how natural or ambient light moves through the space, notice where it falls on your subject, what shadows it creates, and how it interacts with the environment’s textures and colors. Walk around the location at different times if possible. Morning light through a workshop window, the warm glow of a café at dusk, or diffused overcast light outdoors each create distinct moods that shape your narrative.
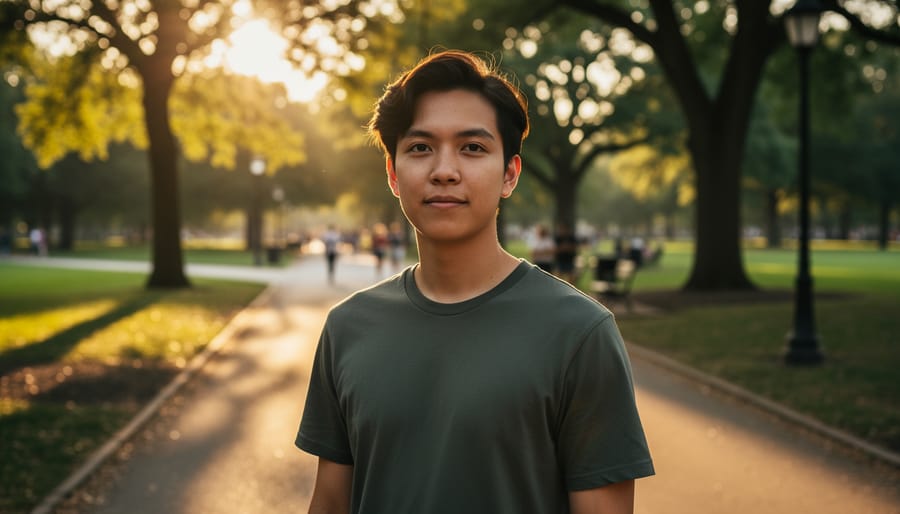
Position your subject where the light flatters their face while preserving the scene’s authenticity. Near windows or doorways, angle them so light wraps around their features rather than hitting them flat-on. Outdoors, open shade under a tree or building overhang gives soft, even light without harsh shadows. A destination portrait session might mean working with bright tropical sun, seek shaded areas or wait for golden hour to maintain that natural feel.
When the ambient light needs a gentle boost, use a reflector to lift shadows on your subject’s face without fighting the environment’s existing light quality. Hold it low and angled to mimic natural fill rather than creating an obvious second light source. Avoid portable strobes or heavy fill that flatten the scene’s dimension, the goal is enhancing what’s already there, not replicating studio conditions. If the light feels wrong or too harsh, wait or reposition rather than overpowering the space with artificial lighting that erases its character.
Step 4: Compose the Frame with Environment in Mind
Composition transforms a snapshot into a story. Start by choosing a focal length that includes enough environment to provide context, 35mm to 50mm lenses work beautifully for showing a subject within their space without excessive distortion. Decide how much background to reveal: too little and you lose the environmental story, too much and your subject gets lost. A good rule is that the viewer’s eye should land on the person first, then explore the surroundings.
Layer your frame to create depth. Position foreground elements, a doorway, foliage, or furniture edge, to frame your subject naturally. Place your subject in the mid-ground, then let background elements tell their story. This three-dimensional approach makes images feel immersive rather than flat. When shooting estate portraits or similar grand locations, use architectural lines to guide the eye toward your subject.
Balance is key. If the environment is visually busy, simplify by using a wider aperture (f/2.8 to f/4) to gently blur distracting details while keeping context recognizable. In quieter settings, shoot at f/5.6 or narrower to keep more elements sharp. Step back and preview your frame: does every visible element earn its place by adding meaning, or is it just clutter?
Step 5: Pose Your Subject Naturally Within the Space
The best environmental portraits happen when your subject feels comfortable enough to forget the camera and simply exist in their space. Start by giving simple, action-based direction rather than asking someone to “pose.” If you’re photographing a chef, have them plate a dish or check seasoning. A musician might tune their instrument or flip through sheet music. A writer could review notes or gaze out the window where they usually think.
Movement creates authenticity. Ask your subject to walk through the space naturally, pause at a workbench, or reach for a tool they use daily. These small interactions prevent the stiffness that comes from holding still and watching the camera. The moments between your directions often yield the most genuine expressions.
Pay attention to how your subject naturally holds their body in this environment. Do they lean against a counter? Rest a hand on equipment? Cross their arms while thinking? Mirror those instincts rather than imposing traditional portrait posing. If someone typically sits with one leg crossed or stands with their weight shifted, let them settle into that position.
Keep your instructions conversational and encourage your subject to look away from the camera frequently. Direct their attention toward elements in the scene, creating moments where they’re focused on their work, their thoughts, or the space itself. These glimpses of genuine connection between person and place tell a far richer story than a camera-facing smile ever could.
How to Know When You’ve Captured a Strong Environmental Portrait
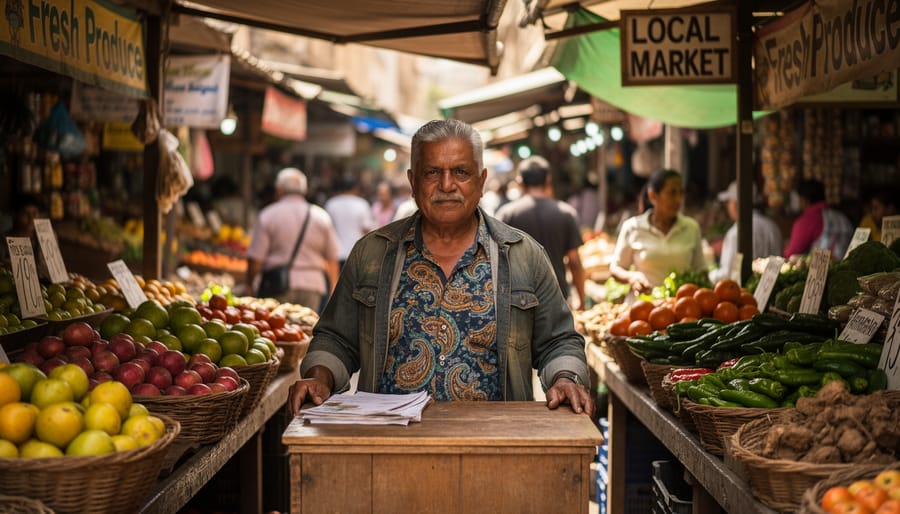
A strong environmental portrait reveals itself in the moment you review the image, you see the subject and their story simultaneously. The environment should feel purposeful, not accidental. When you’ve nailed it, viewers immediately understand something about who this person is and what matters to them, whether it’s a chef surrounded by their kitchen’s copper pots or a musician framed by rows of vinyl records.
Start your review on-site by checking these core indicators:
- The environment adds context and meaning without overwhelming the subject
- Your subject’s expression feels natural and authentic to the setting
- Both subject and background are properly exposed, with no blown highlights or crushed shadows
- The subject remains the clear focal point with sharp, intentional focus
- Compositional elements lead the eye toward the subject rather than competing for attention
Zoom in on your camera’s LCD to verify critical sharpness on the subject’s eyes. Check that the background remains recognizable but doesn’t steal focus, it should support the narrative, not shout for attention. If you’re shooting indoor portraits confirm that window light or ambient sources create dimension on your subject’s face without harsh shadows.
In post-processing, assess whether the color palette feels cohesive. The environment’s tones should complement your subject, not clash. Look for distracting elements you might have missed during the shoot, bright signs, clutter, or stray objects that pull the eye away from your storytelling. A successful environmental portrait strikes a delicate balance: the viewer notices the person first, then discovers the meaningful details of their world. If you find yourself drawn to the background before the subject, revisit your composition.
Common Questions About Environmental Portrait Photography
What’s the best time of day for outdoor environmental portraits?
Golden hour, the hour after sunrise and before sunset, offers soft, flattering light that complements natural settings beautifully. Overcast days work equally well, providing even illumination without harsh shadows.
How much of the environment should I include in the frame?
Include enough context to tell the story without overwhelming your subject. A good starting point is showing 30-50% environment, keeping your subject clearly dominant while allowing the surroundings to add meaningful context.
Can environmental portraits work indoors as effectively as outdoors?
Absolutely. Indoor spaces like studios, workshops, kitchens, or offices often reveal more about who someone is than outdoor locations. The key is choosing an environment that reflects your subject’s personality or profession, regardless of whether it’s inside or outside.
How is environmental portrait photography different from lifestyle photography?
Environmental portraits focus on a single subject within a meaningful setting, emphasizing who they are. Lifestyle photography captures people in action or candid moments, prioritizing the activity itself over individual character study.
The technique connects deeply to visual storytelling tradition where photographers reveal character through carefully chosen surroundings rather than posed studio backdrops. When you’re reviewing your environmental portraits, ask whether someone viewing the image would understand something essential about your subject from the setting alone. The environment should answer questions about their passions, profession, or personality without needing a caption to explain the connection.